Jimdo website builder is one of the top site creation platforms. You can build a website, publish & adding amazing functions or apps within an hour. But many people don’t know how to make a website from the beginning to end even its all tasks are easy. In this tutorial, we explained from selecting the template to registering your domain name & publishing your site online. This is very helpful for beginners who don’t know anything about building a website with Jimdo. (If you already knew about Jimdo, then read Jimdo reviews. Because, In Jimdo reviews, you will get to know the usage of all the designing tools.) You no need to learn anything. We explained with step by step. Just follow the below steps.
1.Select a Jimdo Template
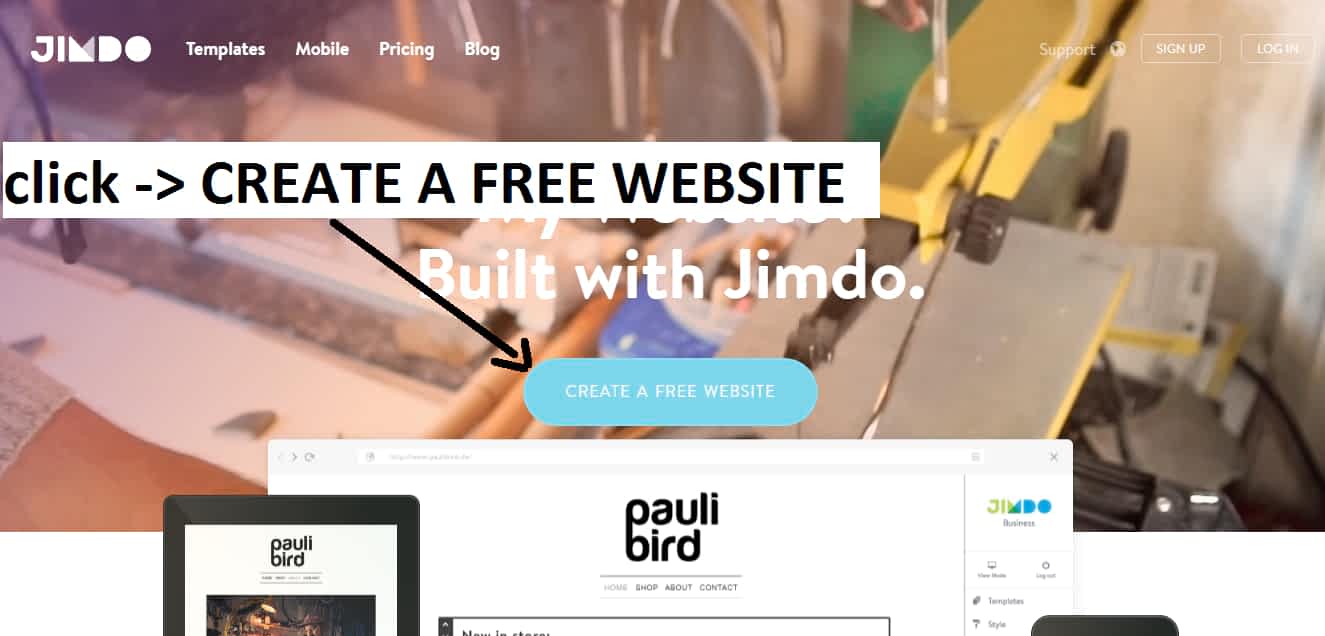
You need to go Jimdo official website. You will see its homepage. Click on create a free website button. (I showed in the below screenshot by a black arrow)
Once you clicked, it goes to Jimdo templates page. You need to scroll down to see all its templates (Ready-made website designs)
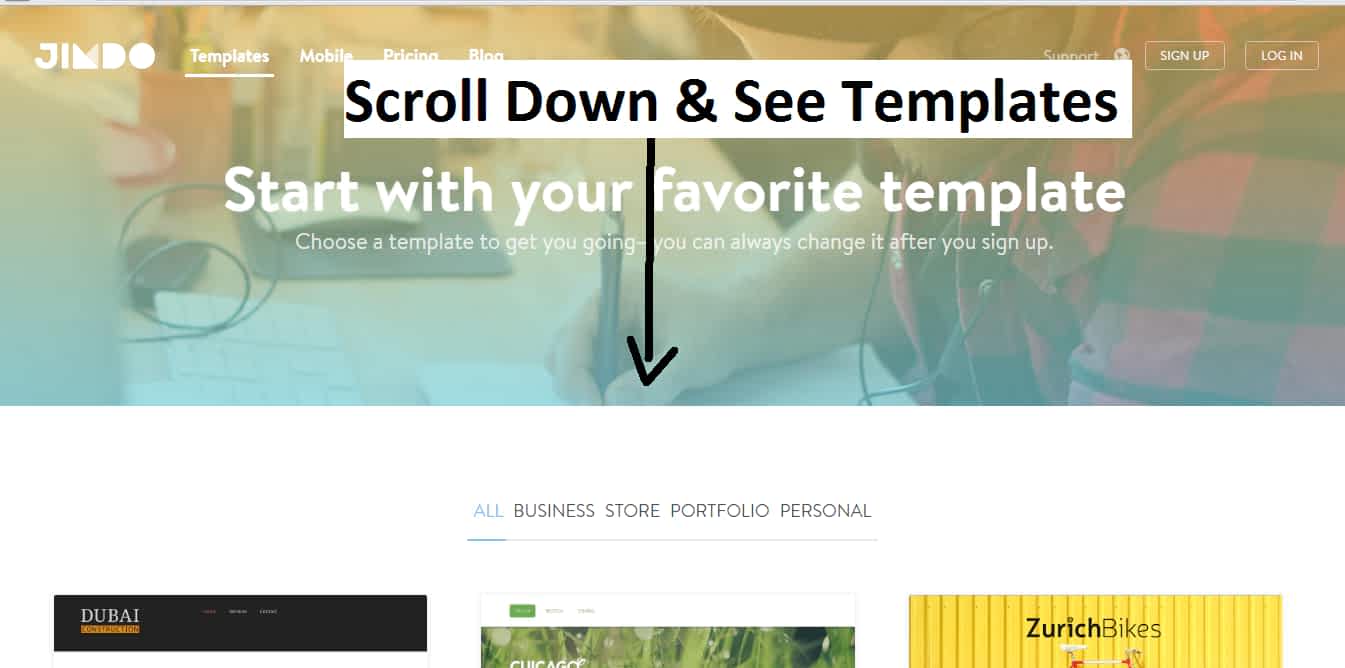
Once you scroll down, you will see, all templates, you can also sort it by business, online stores, portfolio and personal templates. Total 40 templates are available. (It doesn’t matter, you can modify anything you want). Click on any template you liked. (Don’t worry, you can change your template anytime without losing your work even after you published your website. If you changed your templates after finishing your work, It automatically fits your design as well as uploads with your changed template).

Once you clicked on the templates, a signup page will appear. You need to create an account with Jimdo.
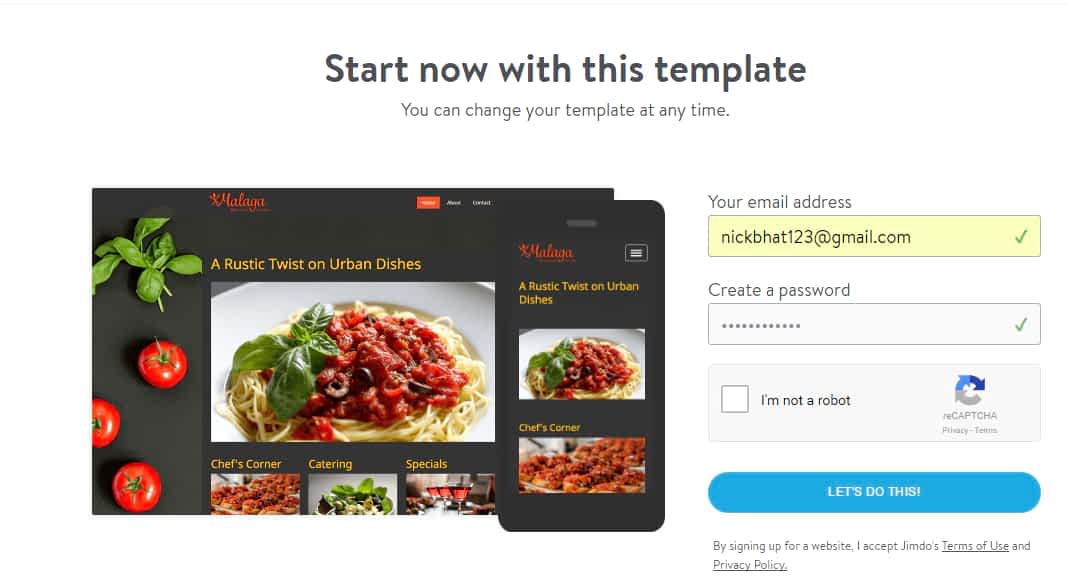
When you are signing up, I am not a robot (Captcha Challange) may irritate you. Here you need to prove, you are not a robot. Just click on the checkbox. (Many people don’t click on the checkbox & directly click on “let’s do this” button. So they will see an error message. Several times they try & go back to see another website builder.)
Click on Let’s do this.
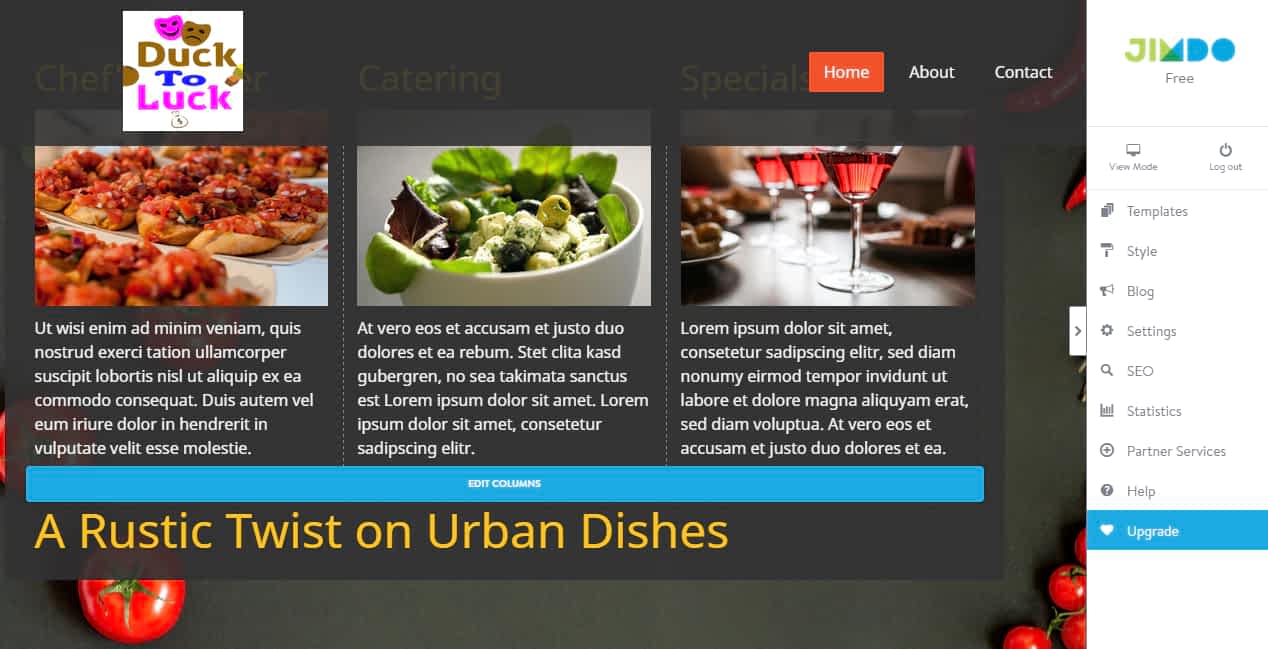
Once you clicked on let’s do this button, your site builder will load on your screen.
Editing The Template – Design & Building Your Own Website
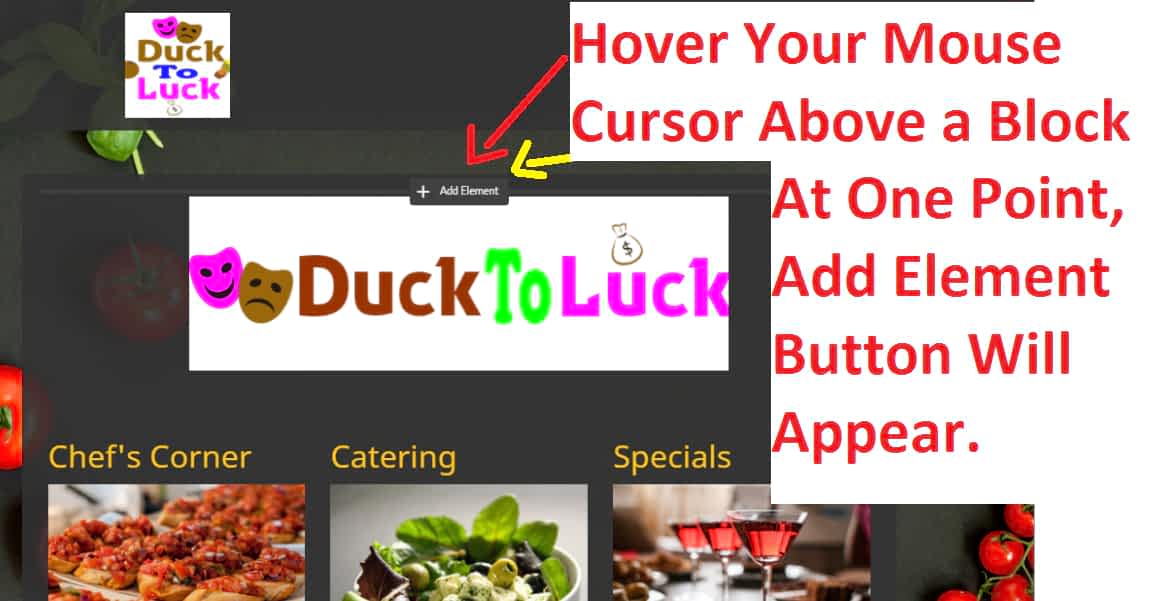
Once Jimdo site builder loaded(20 – 40 seconds), you no need to wait for anything. Here you can edit, delete, modify, upload, drag & drop any element or blocks from anywhere within the page. You can add new elements like social like or shares, maps, subscribe, store items or its related things or any type of widget you liked including third party apps. If you want to add a new element, hover your mouse cursor on the upper edges of any blocks, then automatically “+Add Element” button will appear as shown in the below screenshot.
Once you click on, the main elements of the first two line will appear. Click more elements to see all its functions or elements.
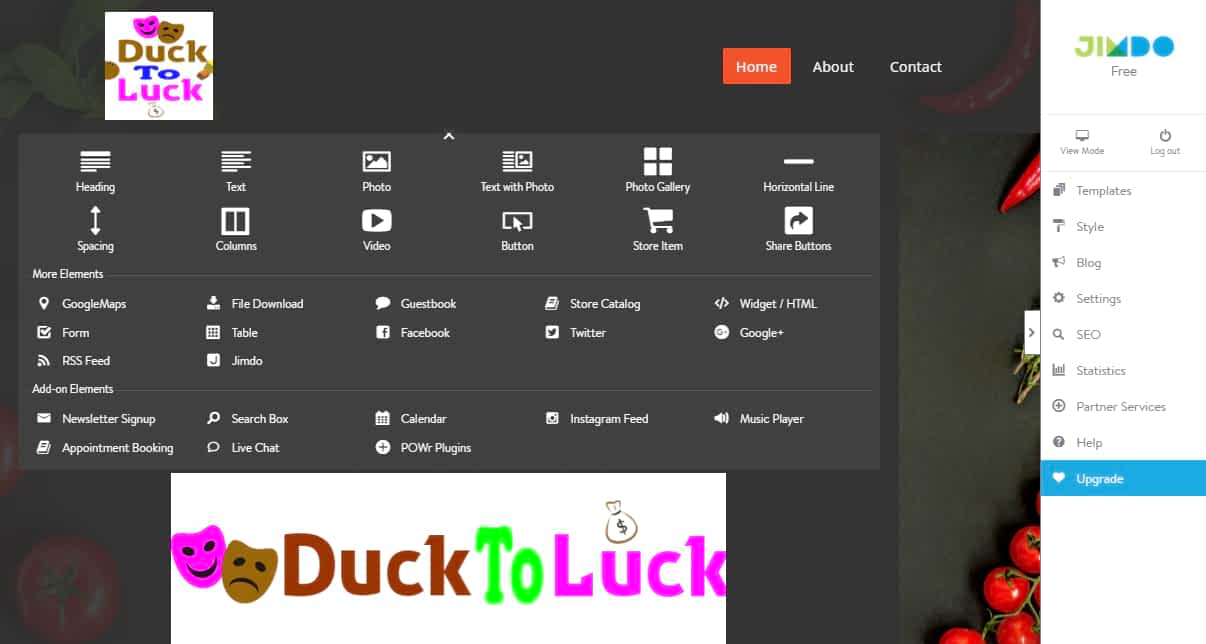
If you are a beginner, then Add-on-elements may difficult for you. If you really wanted to add amazing apps and you don’t understand how to add these apps, don’t worry. go to Jimdo support center . There you can learn how to install 1000s of third party apps in a single click. Jimdo is also one of the best website builders. You can add any apps by copy-pasting codes from third party services like POWr plugins. You can add many pages and sub pages. To add, you need to hover your mouse cursor near to the left edges of the existing menu. Then edit navigation button will appear. See the below screenshot.
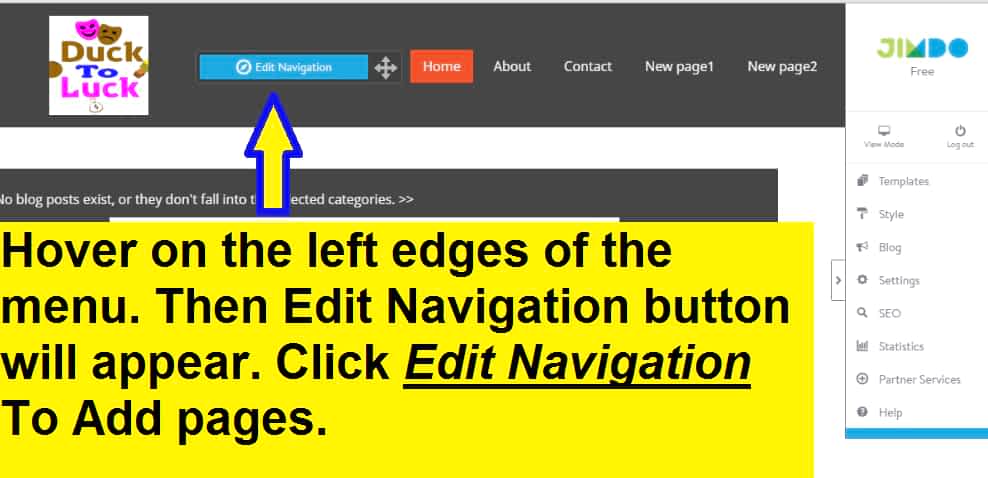
Click on edit navigation. You will see add pages button. You can also do many modifications with pages like edit, delete, making sub-pages dragging and changing its positions etc.
3.Publish Your Website
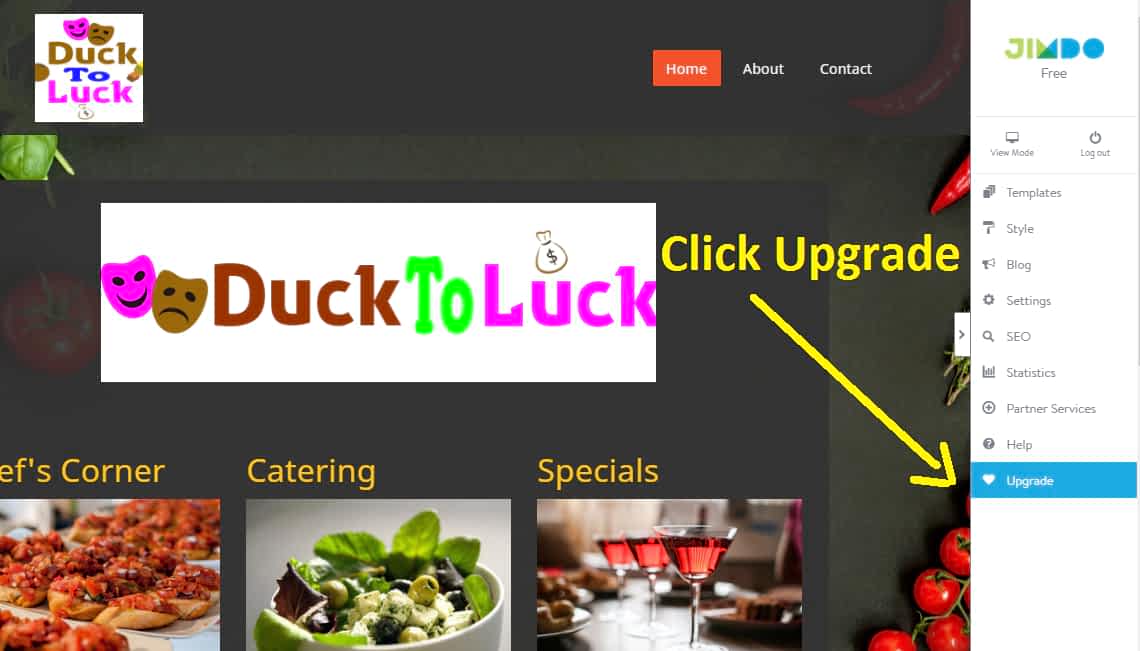
Once you finished website editing, you can publish it. (Don’t worry, you can change anything even after you published your website.) Click On Upgrade button as shown in the below screenshot (See Yellow Arrow).
Once you clicked on upgrade, you will see jimdo plans & pricing.
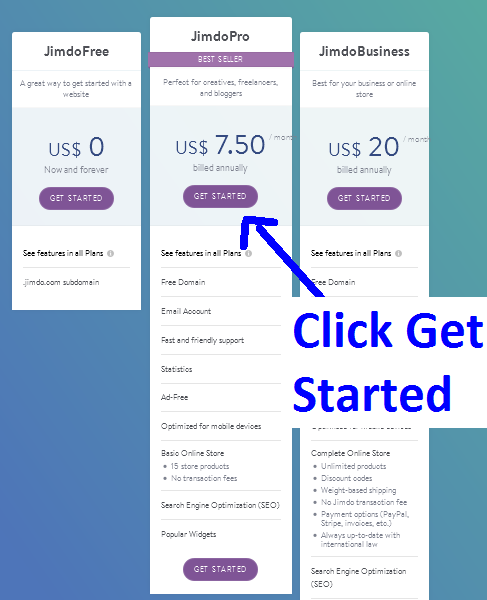
I recommend, the middle one- Jimdo Pro Plan for beginners. Don’t choose a free plan. Why? Do you want to know?
You must read this one before building any website :- Free Website Builder |Top 14 Checklists You Should Know.
$7.5/month plan is the best one for beginners. You need to pay for 1 year. That means, total $90/year you need to pay.
(Oh..! My yearly party bill is nearly 100 times more than this.) Once you ordered your plan, you will get a chance to register your domain name (website name or website home page URL). I wanted to name my website as DuckToLuck.com. I typed in the search bar and clicked on check availability. But it is already registered by someone.
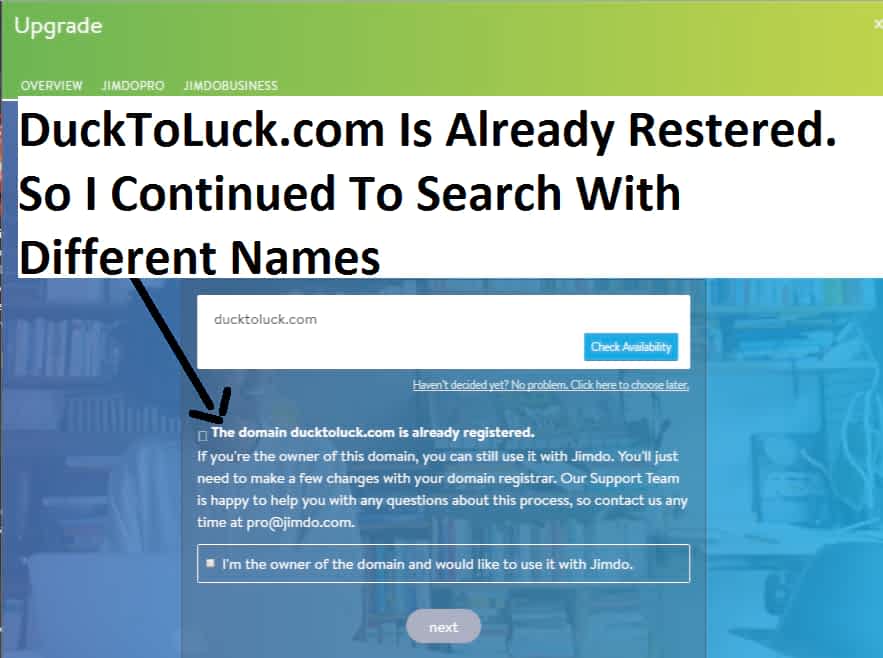
So I tried with different names.
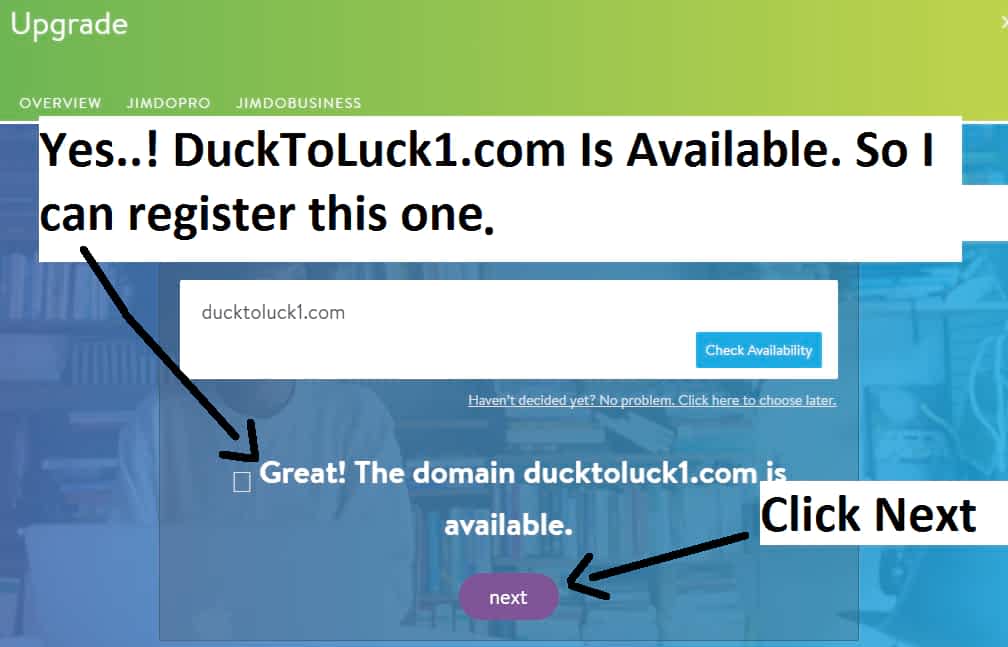
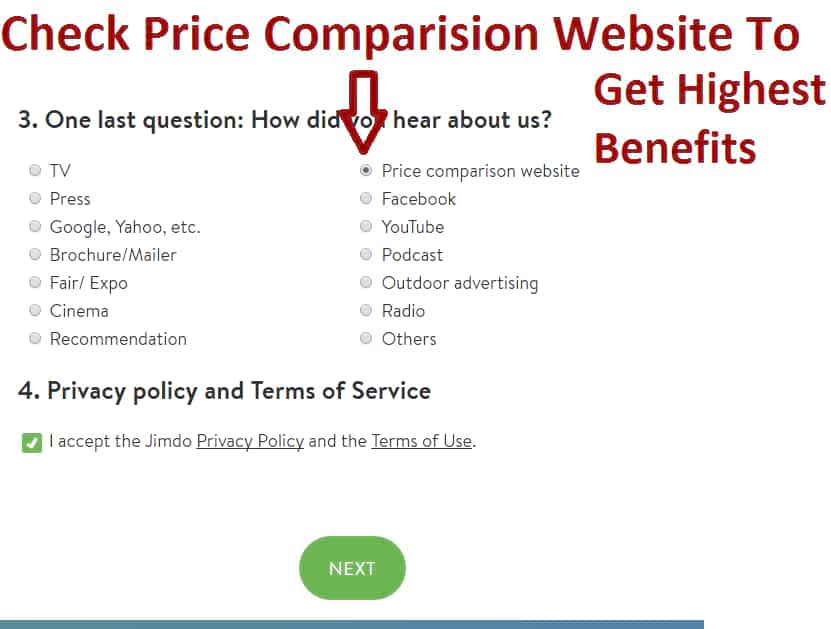
Once you see available, then a next button will appear. Click on the next. You will see payment options. You can pay with your Paypal or any credit or debit card. At the end of billing, you will see the below question –“How did you hear about us?”. Select price comparison website. They think you are very price conscious. They don’t want to lose any customers. Because they need to show an increased user rate to their shareholders. So they will offer huge discounts. (I already worked on website builder related companies for a few months. This is how they told me to manage customers)
If you got any problem, contact us or comment below.
Once you clicked on the next, Everything is done. Your website is now alive world-wide. All billing details & receipt will send to your email.
Jack is the Co-founder of WebsitebuilderLy, a Software Engineer from Standford University, An entrepreneur with 12 years of Website Creation, Management, Marketing Automation & App Development Experience. Worked for the world’s leading companies such as Roblox, HTC, etc.


thanks. please, show me software to create an instant message or chating website like whatapp